
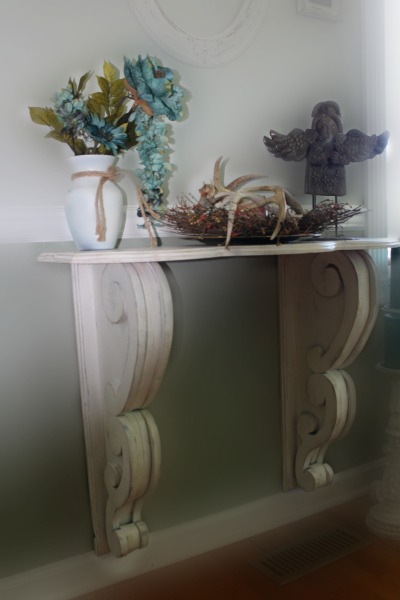

On a recent trip to one of my favorite flea Markets, I came across this gorgeous pair of corbels. They where however a bit pricey for me, so in true ‘Julia’ nature I decided to make my own.
┬á ┬á After looking at hundreds of pictures and watching several You Tube video’s, I took the plunge. First I drew out my design, then decided on the size. The corbels where for a side table I wanted by my front door so I made them 29″ in total length.
 Just incase you’re wondering, I don’t have all the fancy tools to cut out intercut designs, I just have my trusty jig saw. I first made a template with some old paneling I had, then I cut out the design….very carefully.
Once all my pieces where cut I simply glued and screwed them together, I filled the screw holes with wood filler and after that was dry I sanded and sanded and then sanded some more. I had to use the grinder in a couple of places but I didn’t want them too perfect, I like the distressed look.
   Now for the paint, of course I used Annie Sloan Chalk Paint  I first used Louis Blue then the Pure White. Its quit hot here right now so the Corbels dried very quickly. I sanded just a little around the edges to distress then applied a clear coat of wax.
What you will need
- #3 pine
- screws
- wood glue
- wood filler
- paint
- wax
For the Top I simply cut out the size I wanted then used a templet to curve the front edges, I didn’t want the table to be square on top, more of a French country look.
My hubby helped me route out the back of the corbels so we could mount them to the wall,  just make sure you get the hardware in the right place.

Not bad for a first, I will definitely be making more of these, I just love my little side table.


